


I took a photo of myself wearing a New Year's Eve hat. It came out well. The only problem was, the writing was reversed. I knew that if you take yourself in a mirror the writing is reversed. I had not realized that you get the same problem with a selfie.
Reversal would also take place if you wear a t-shirt with a slogan. The same applies to a baseball hat with writing.


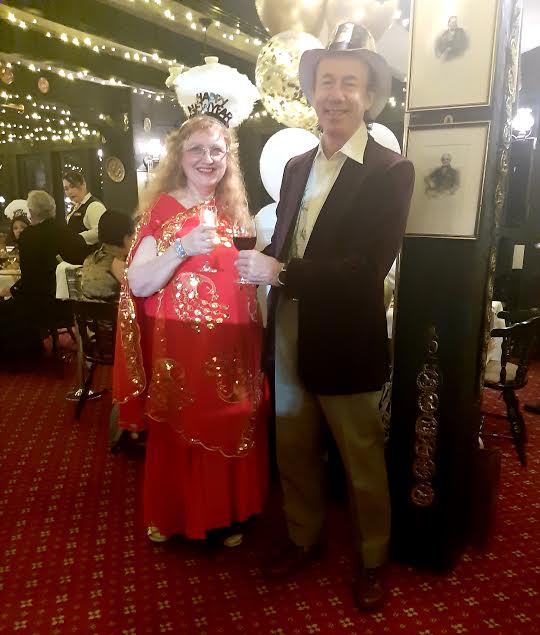
Selfie with writing rversed.
There are two ways around this.
1 Ask a bystander to photograph you. Ideally not a stranger who might run off with your phone. In my view a safer bet is a member of the restaurant staff.
2 Take another picture without the hat

3 Reverse the picture left to right.

Selfie reversed.
How do you do this? We did not know. But we reckoned there must be a symbol somewhere that fixed the problem. It had to be somewhere in our edit photos mode on the mobile phone. Failing that, we would have to fix it later on a photo editing programme in a laptop or computer programme.
Before risking ruining the picture we liked, we took another picture on which we could experiment.
Then we went into the editing photo mode on the mobile phone.
On a Samsung Galaxy this is the process:
1 Go into photo taking mode.
2 Use the reverse photo mode which on the Samsung Galaxy is a circle with two arrows around itand
3 Take a photo of yourself wearing a hat with writing.
4 $o see the photo you have just taken, you could go back into the main menu and press the photo view symbol. On the Samsung Galaxy it is called Gallery. The photo you have just taken is at the top of your screen under Today.
5 Once you are in photo taking mode, I find it quicker to click on the small picture of the photo you have taken in a circle to the left of the big white circle you press in the middle of the lower band on the screen.
6 Under the photo you see four symbols. One looks like a pencil for editing photos. click on this.
7 Up comes a small set of five symbols, below that a series of vertical lines which you slide from the middle to the left and right to adjust the horizontal.
Below that is the third set of symbols.
8 I usually use the two on the left of the bottom row. the one on the far left enables you to adjust the middle line of vertical lines to adjust the horizon and get the picture level. Placing the pointer on the corners and pulling the corners of the picture diagonally enables you to cut out background such as
too much ceiling or floor, other people you don't want in the picture, or just to focus on the face and hat.
9 On the top row of symbols under the picture, the second symbol from the left looks like a vertical line with two arrows pinting away, like the symbol on a lift to open the doors. Click on this with your fingertip and your photo reverses right to left. (Click on it again and you will return to previous view.)
10 Remember to save the new version by clicking on the word save above the top of the screen.
11 If you have a different phone, go into Google and type in your phone brand name and model and the words how to reverse photo. Or ask the same question in help mode in your phone.
12 Using your experimental photo, click on all the symbols in photo edit mode to see what they do.
13 When you are with a large group of friends or family, ask a technical person, or a keen phtographer, or somebody who has the same phone, for their advice on editing photos.
14 If they do not know this trick, show them and ask what tricks they can teach you.
You may wish to avoid standing in front of any sign which will be reversed when you take a selfie photo.
However, I like to take a photo of a sign to tell me later where I was in order to help label the photos later.
Happy photo taking.
Author
Angela Lansbury, travel writer and photographer, author and speaker. Please bookmark your favourite posts and share links with your family, friends and colleagues.
Reversal would also take place if you wear a t-shirt with a slogan. The same applies to a baseball hat with writing.

I wanted to get to this:

Selfie with writing rversed.
There are two ways around this.
1 Ask a bystander to photograph you. Ideally not a stranger who might run off with your phone. In my view a safer bet is a member of the restaurant staff.

2 Take another picture without the hat

3 Reverse the picture left to right.

Selfie reversed.
How do you do this? We did not know. But we reckoned there must be a symbol somewhere that fixed the problem. It had to be somewhere in our edit photos mode on the mobile phone. Failing that, we would have to fix it later on a photo editing programme in a laptop or computer programme.
Before risking ruining the picture we liked, we took another picture on which we could experiment.
Then we went into the editing photo mode on the mobile phone.
On a Samsung Galaxy this is the process:
1 Go into photo taking mode.
2 Use the reverse photo mode which on the Samsung Galaxy is a circle with two arrows around itand
3 Take a photo of yourself wearing a hat with writing.
4 $o see the photo you have just taken, you could go back into the main menu and press the photo view symbol. On the Samsung Galaxy it is called Gallery. The photo you have just taken is at the top of your screen under Today.
5 Once you are in photo taking mode, I find it quicker to click on the small picture of the photo you have taken in a circle to the left of the big white circle you press in the middle of the lower band on the screen.
6 Under the photo you see four symbols. One looks like a pencil for editing photos. click on this.
7 Up comes a small set of five symbols, below that a series of vertical lines which you slide from the middle to the left and right to adjust the horizontal.
Below that is the third set of symbols.
8 I usually use the two on the left of the bottom row. the one on the far left enables you to adjust the middle line of vertical lines to adjust the horizon and get the picture level. Placing the pointer on the corners and pulling the corners of the picture diagonally enables you to cut out background such as
too much ceiling or floor, other people you don't want in the picture, or just to focus on the face and hat.
9 On the top row of symbols under the picture, the second symbol from the left looks like a vertical line with two arrows pinting away, like the symbol on a lift to open the doors. Click on this with your fingertip and your photo reverses right to left. (Click on it again and you will return to previous view.)
10 Remember to save the new version by clicking on the word save above the top of the screen.
11 If you have a different phone, go into Google and type in your phone brand name and model and the words how to reverse photo. Or ask the same question in help mode in your phone.
12 Using your experimental photo, click on all the symbols in photo edit mode to see what they do.
13 When you are with a large group of friends or family, ask a technical person, or a keen phtographer, or somebody who has the same phone, for their advice on editing photos.
14 If they do not know this trick, show them and ask what tricks they can teach you.
You may wish to avoid standing in front of any sign which will be reversed when you take a selfie photo.
However, I like to take a photo of a sign to tell me later where I was in order to help label the photos later.
Happy photo taking.
Author
Angela Lansbury, travel writer and photographer, author and speaker. Please bookmark your favourite posts and share links with your family, friends and colleagues.
No comments:
Post a Comment